The Engine Control Module is the brain of your vehicle. It manages fuel injection timing, ignition, emissions systems, and communicates with every other module on the network. When it fails, you know about it — multiple warning lights, poor running, or a car that simply won’t start.
Dealer replacement costs typically run $800-$1,500 including parts and labour. With the right OEM replacement unit and two hours, you can do this yourself for a fraction of that.
Before You Start: Confirm the Diagnosis
An ECM failure is often misdiagnosed. Before ordering a replacement, scan for fault codes with an OBD-II reader. ECM-specific codes include P0600-P0609 and U-series codes indicating module communication failure. If you’re seeing random multiple-system faults with no clear cause, the ECM is a strong suspect.
Also check the basics first: battery voltage (should be 12.6V+ at rest), all ECM ground connections, and the main ECM fuse and relay. A failing ground causes ECM behaviour indistinguishable from ECM hardware failure.
What You’ll Need
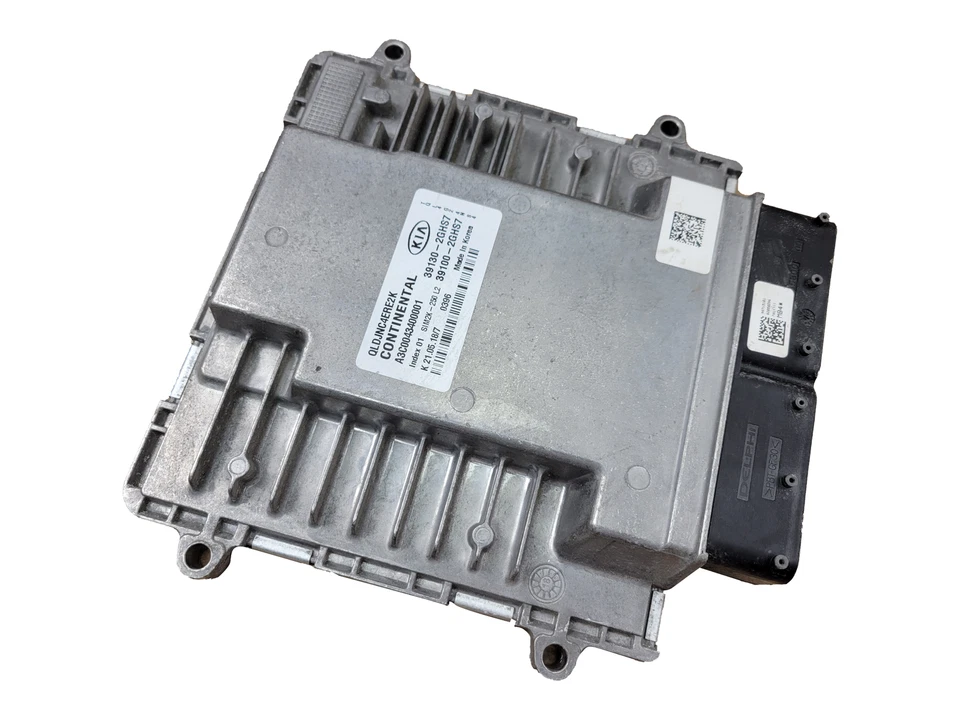
- Replacement OEM ECM (matched to your VIN)
- OBD-II scanner (ideally one that supports module programming)
- Trim removal tools
- Torx and standard socket set
- Battery memory saver (optional but recommended)
Step 1: Get the Right Part
ECM replacement is not plug-and-play on most modern vehicles. The module must match your exact vehicle — year, make, model, engine code, and transmission type. On many platforms it also requires programming to your VIN after installation.
The safest approach is to source a used OEM ECM from the same year and spec as your vehicle, then have a dealer or independent shop flash it to your VIN. This costs $100-$200 at most shops — still well under a dealer-supplied unit.
Step 2: Disconnect the Battery
Always disconnect the negative terminal before working on any electronic module. Wait at least 10 minutes after disconnection to allow capacitors to discharge. If you have a battery memory saver, connect it before disconnecting to preserve your radio presets and other learned parameters.
Step 3: Locate and Access the ECM
Most ECMs are located in the engine bay (often near the firewall or battery tray) or under the dashboard on the passenger side. Consult your vehicle’s factory service manual for the exact location. On most vehicles you’ll need to remove a trim panel or plastic cover to access the module.
Step 4: Disconnect the Wiring Harness
ECM connectors are typically locked with a sliding tab or lever. Do not pull the connector body — release the lock first, then pull straight back along the connector axis. Most ECMs have two or three connectors. Label them with tape if they look similar.
Inspect the connectors while they’re off. Corroded or bent terminals are a common cause of ECM faults and may mean the module itself is fine.
Step 5: Remove and Replace
The ECM is typically held by two to four bolts. Remove them, slide out the module, and reverse the process with your replacement unit. Torque bolts to spec — over-tightening can crack the module housing.
Step 6: Reconnect, Scan, and Relearn
Reconnect the battery. Before starting, scan for codes — a fresh module may set some codes on first power-up, which is normal. Start the vehicle and allow it to idle through a complete warm-up cycle. Modern ECMs relearn fuel trims, idle parameters, and transmission shift points over the first few drive cycles.
When to Call a Pro
If your vehicle uses an immobiliser system tied to the ECM (common on European makes and most post-2010 vehicles), programming is mandatory and requires dealer-level software. The DIY saving is still real — you supply the part, the shop does the flash.
Looking for a tested, OEM-spec ECM? Browse our inventory — all electronic modules are function-tested before dispatch.